How to Use Layers on Cricut Maker Design
Learn how to create a layered image in Cricut Design Space.
-
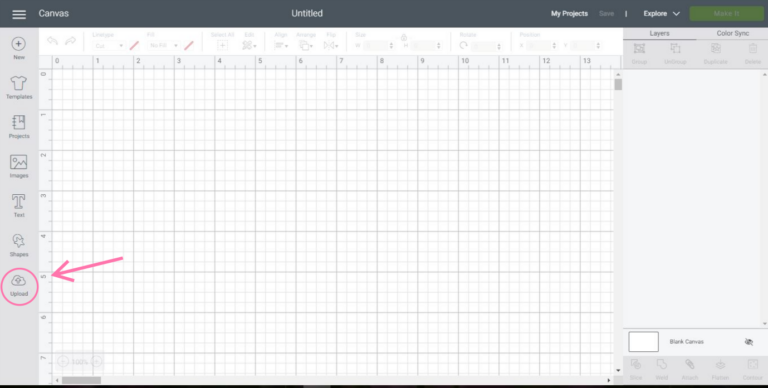
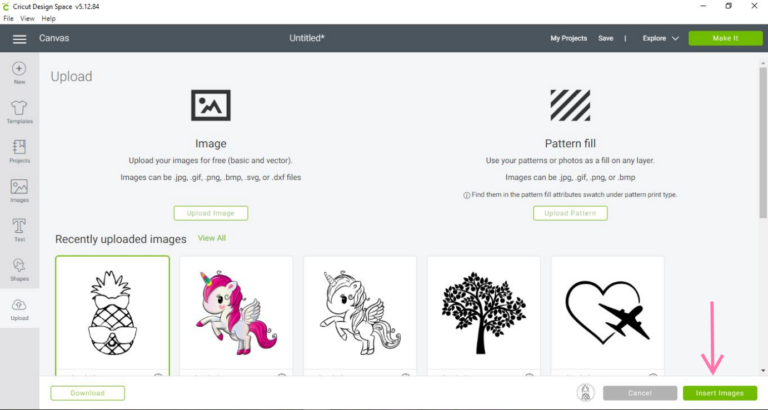
Start Cricut Design Space and open a new project. Then click 'upload'.
-
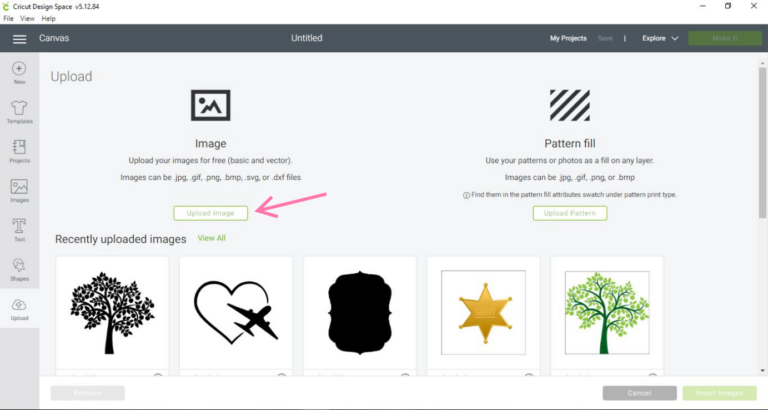
Once the page opens, click 'upload image'.
-
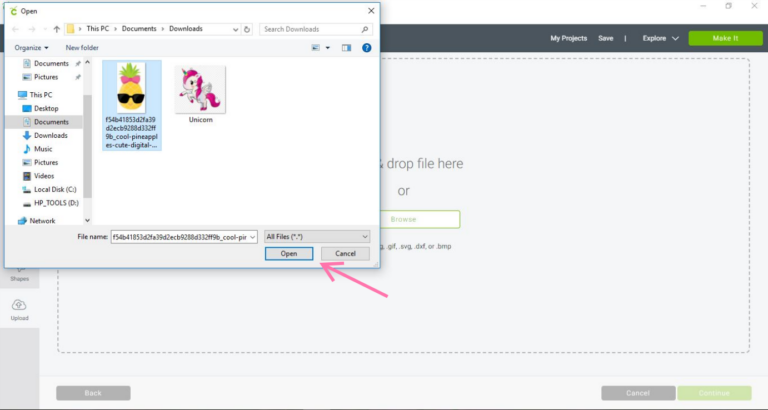
An image file can now be dragged and dropped or can be browsed. Select an image and click 'open'.
-
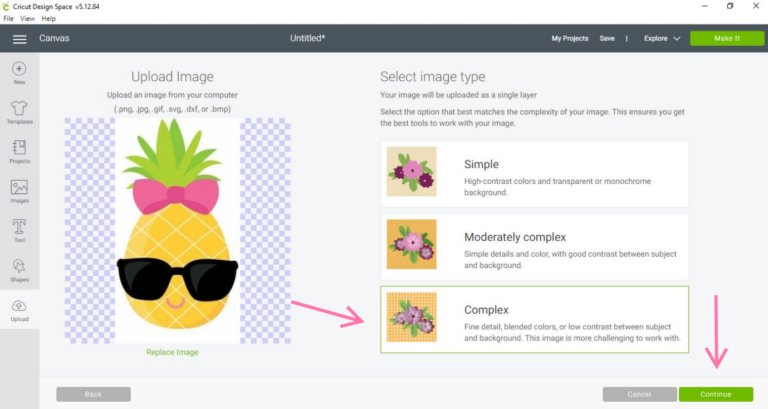
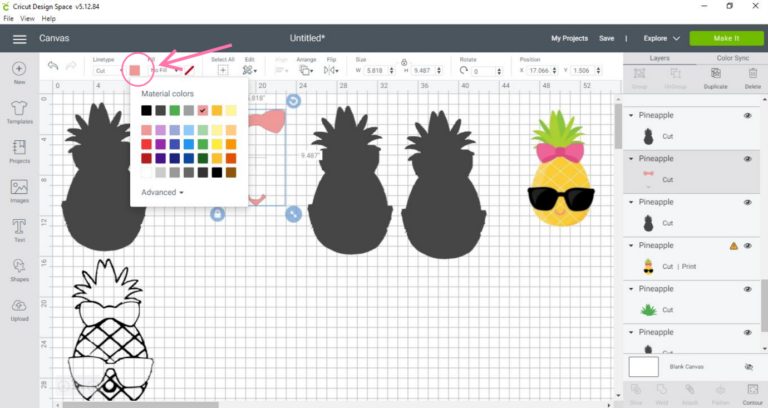
Once the image is uploaded, three options will appear to determine the type of image. Now this depends on your image, but a lot of the time images can fall into the 'simple' category. However, I would recommend choosing the 'complex' category to be safe. Press 'continue' to move forward.
-
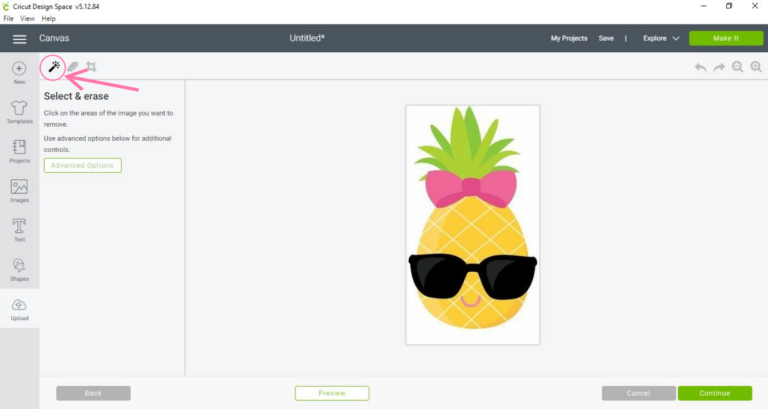
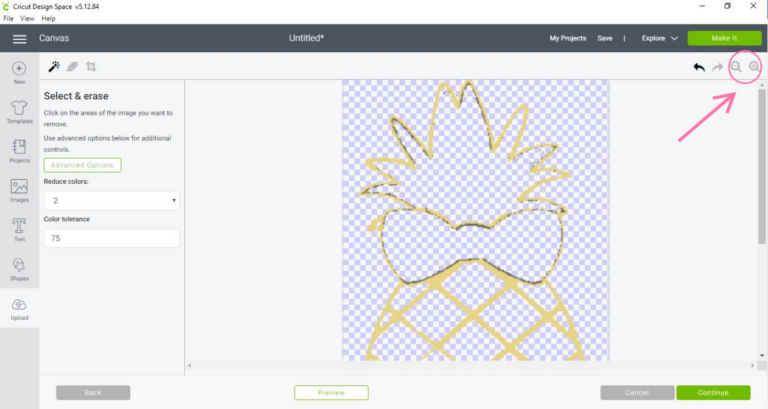
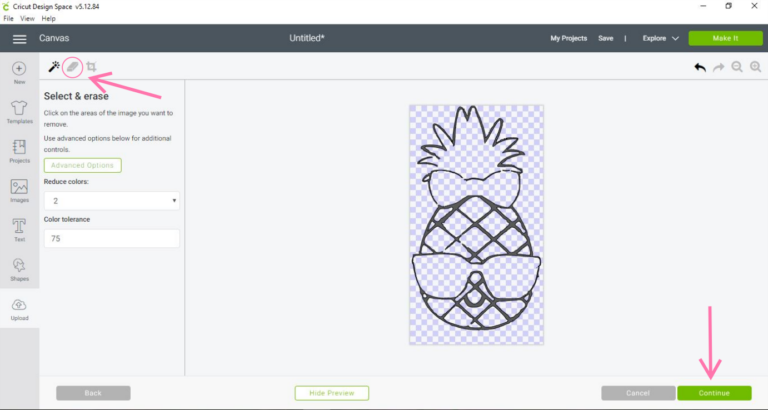
Click on the 'select and erase' wand and erase the background and all the colours.
-
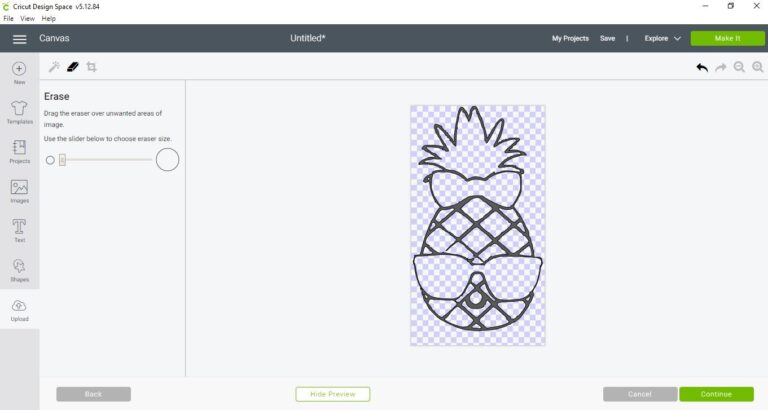
You want to be left with a solid black outline of the image.
-
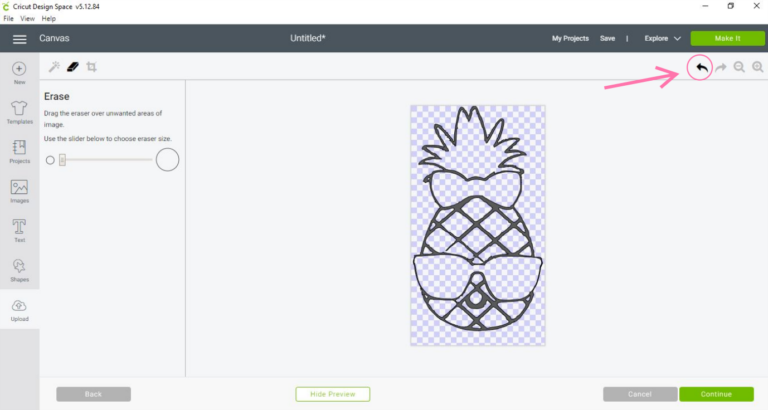
Press the undo symbol if the outline was accidently selected.
-
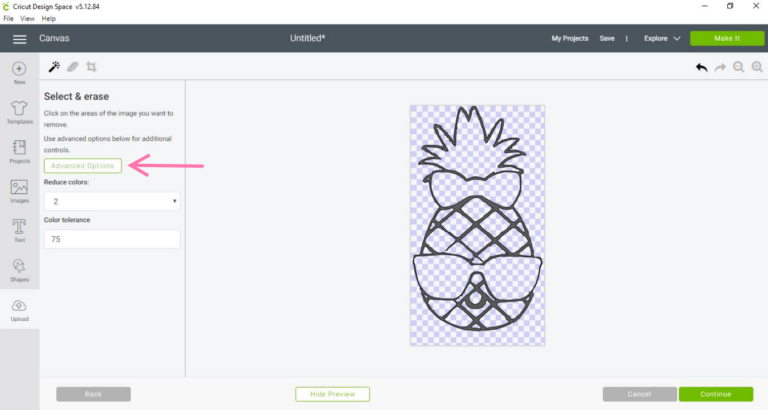
If you see that the outline has harsh edges, press on 'advanced options'. You can adjust this how you like but I recommend reducing the colour to 2 and increasing the colour tolerance to range between 25 to above 50. This helps in cleaning up the image and making the edges smooth. If necessary, press 'undo' and then use the 'select and erase' wand from the steps above to remove the background and colours again.
-
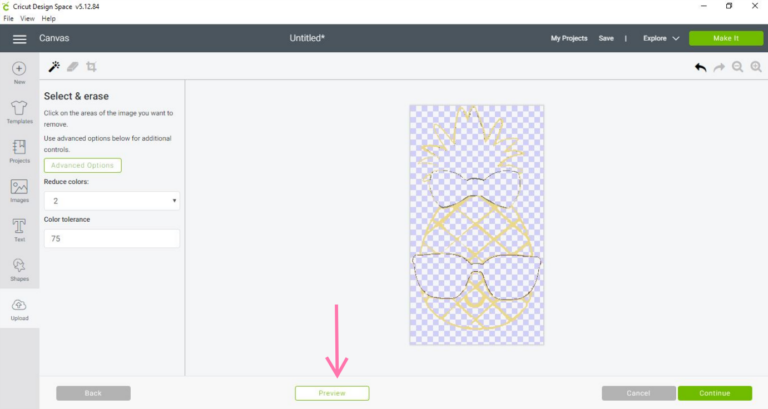
Use the zoom in and out buttons to help see tiny details.
-
Press 'preview' to see if the image is clean without any harsh edges.
-
If there are lines or dots that are around the image, use the 'erase' tool to remove them and then press 'continue'.
-
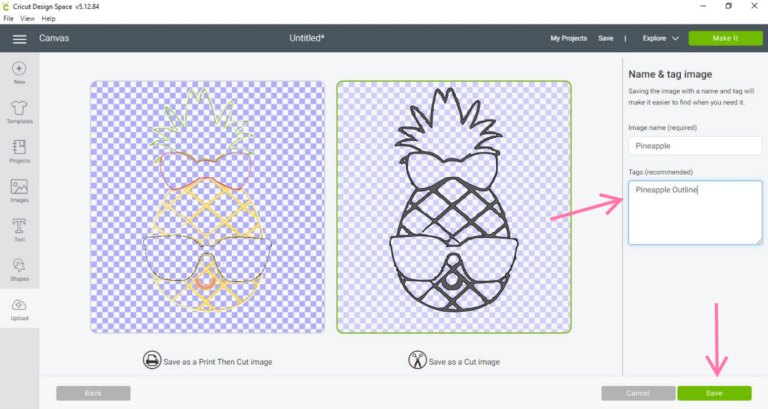
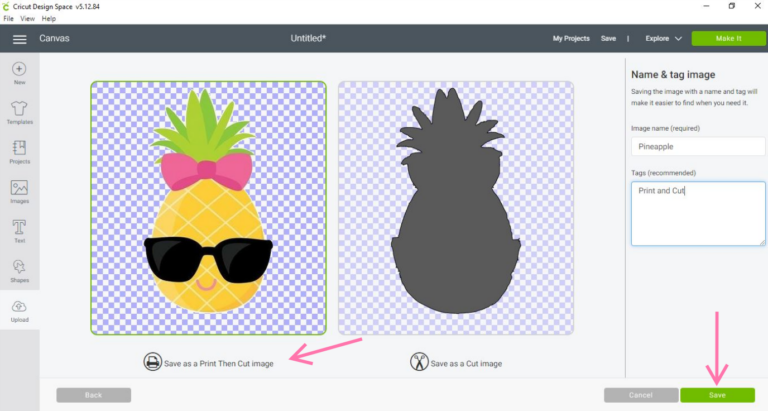
Save as a cut image. Along with adding a name to your image, add a few tags so it is easy to search through your images later.
-
Insert the image into Design Space by clicking on the image and pressing 'insert images'.
-
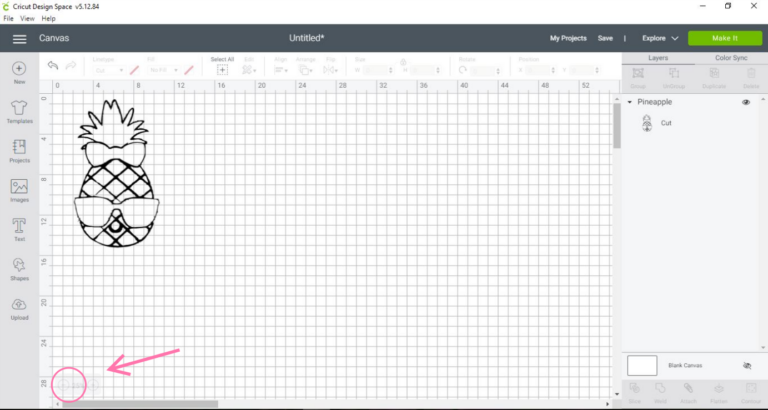
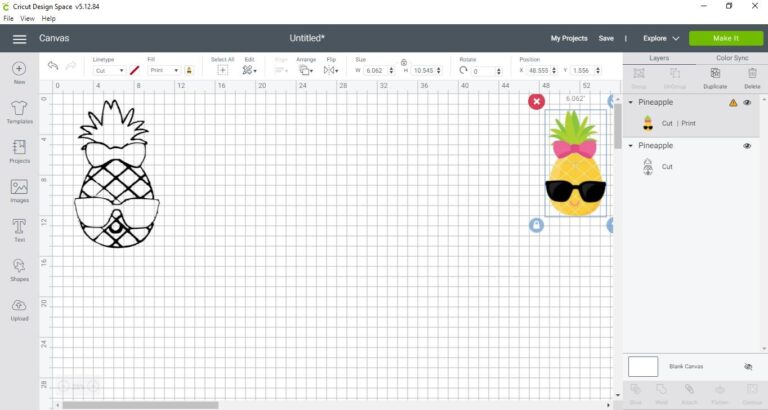
Now your image is on the canvas. Zoom out to 25% to make your canvas bigger. Since there is only one layer, we need to create more to get a multi-layered image.
-
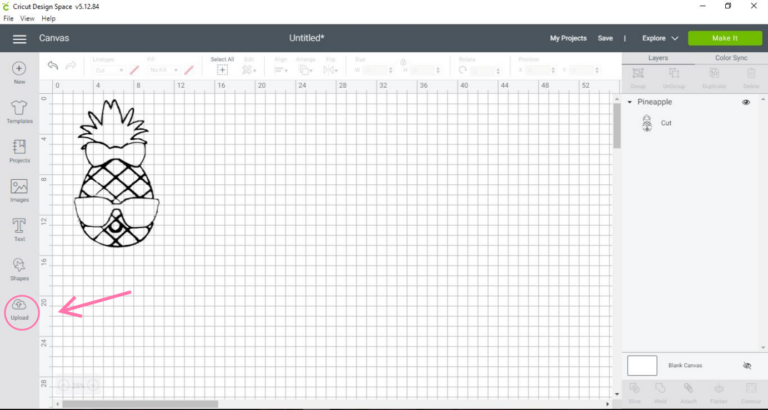
Press 'upload' and upload the same image again.
-
This time upload it as a 'print then cut' image. This allows you to reference the colours of the image easily when creating the layers. You do not need to change the advanced options or remove the colours. Instead, only remove the background. This image can be deleted once all the layers are complete.
-
After saving as a print the cut image, insert it into Design Space and place it in a corner of the canvas. It won't be used until later on.
-
Now, duplicate the first image uploaded that has only the outline and drag it to the bottom left corner. This allows you to see your image in the upcoming steps.
-
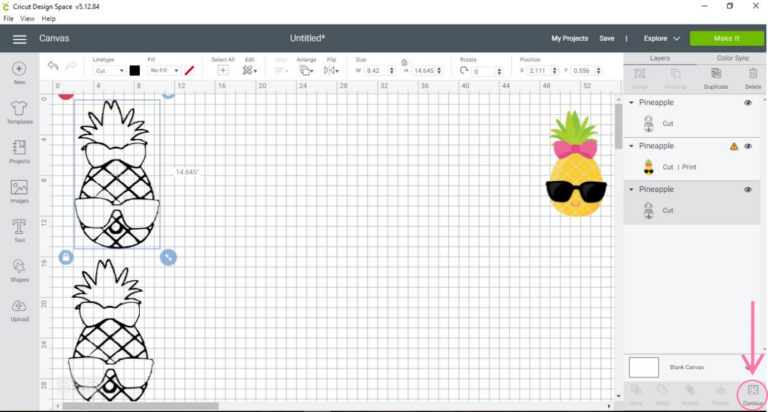
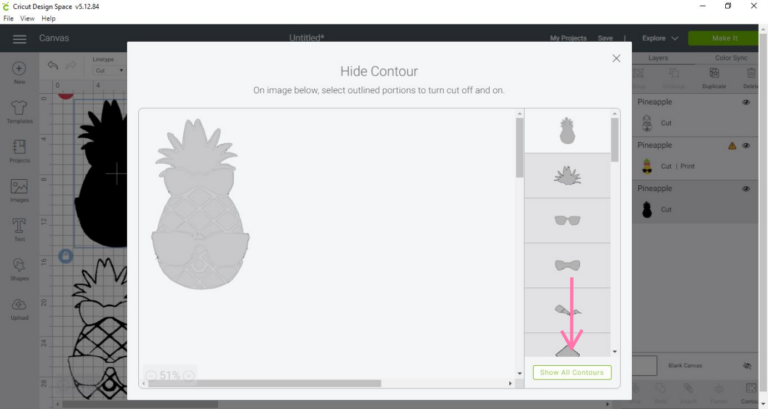
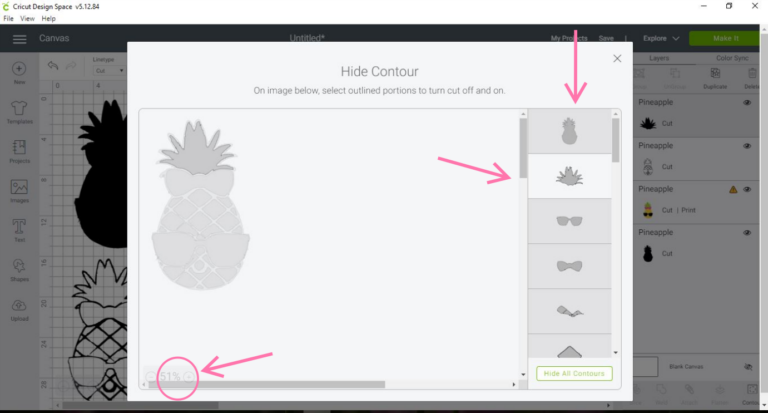
Press 'contour' and a box will appear.
-
Click on 'hide all contours', which causes all the parts of the image to be deselected and only the filled outline will show. This will act as the base for your image once cut out.
-
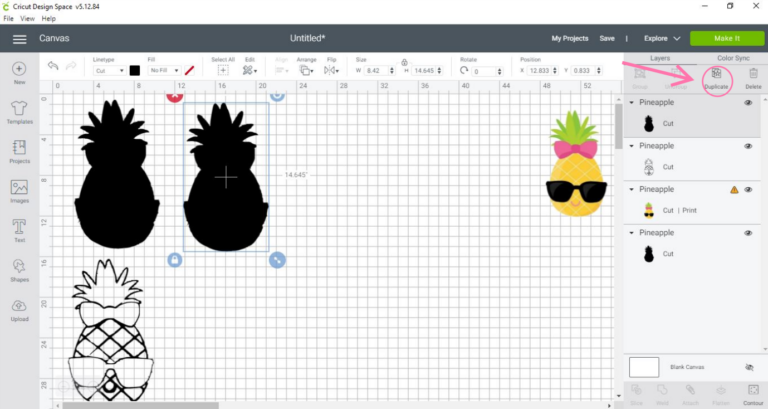
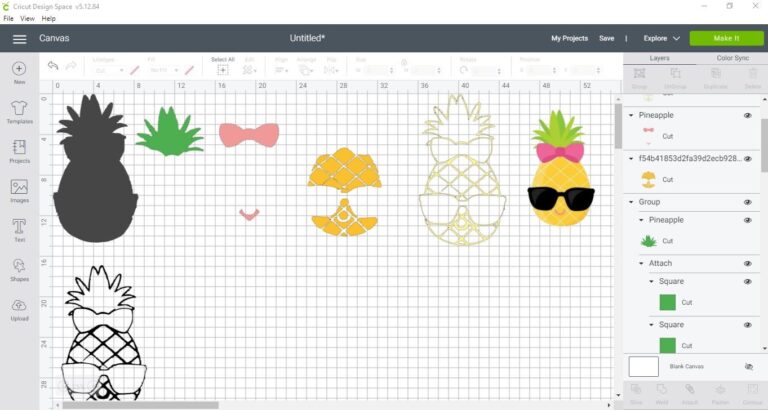
Press back onto the canvas and duplicate the filledin image once again.
-
Press 'contours' again. By referencing the coloured print then cut image, select all the parts of one colour by pressing on the pieces. For instance, I will be clicking on all the parts that have to be green. In this case, it is the leaves of the pineapple. You can zoom in to see the image clearly. If you accidently click on another piece, click on it again to deselect it. Deselect the filled outline and click out of the box.
-
Change the colour of the image you just created to the reference colour.

-
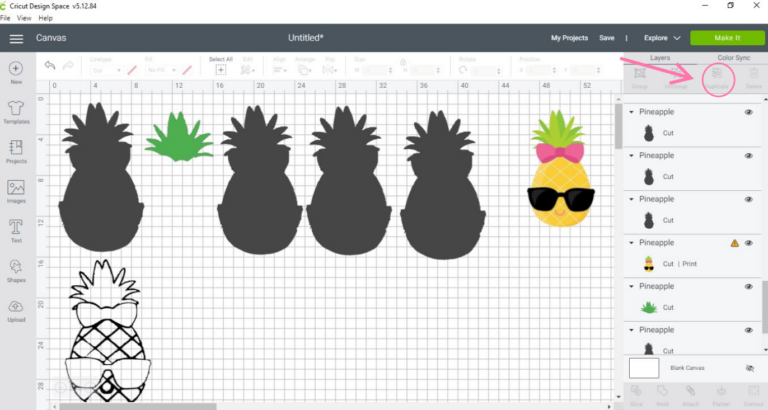
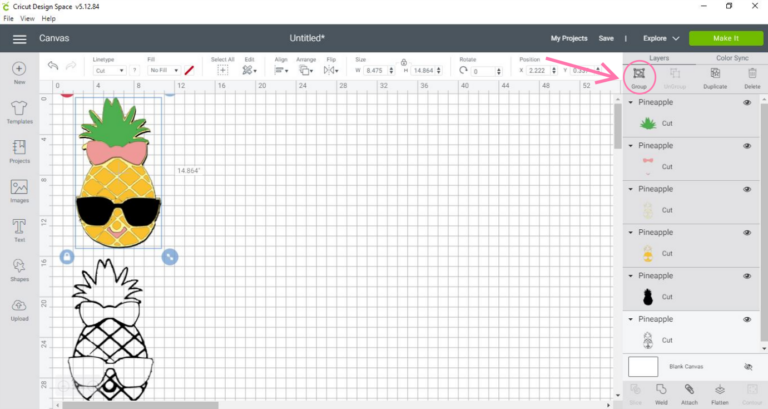
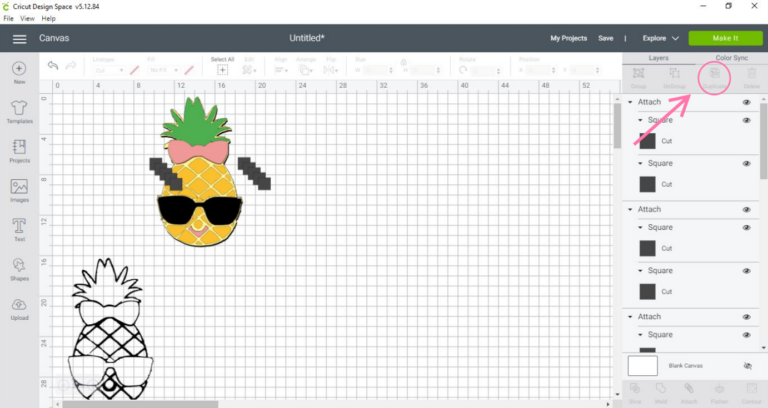
Then duplicate the original filled in image as many times as necessary to do the same with all of the other colours. For example, 5 colours will account for 5 layers altogether. In this case, I have duplicated it 3 more times since I already have one green layer and one base black layer. Once all of the layers are contoured, check in the layers panel to confirm.
-
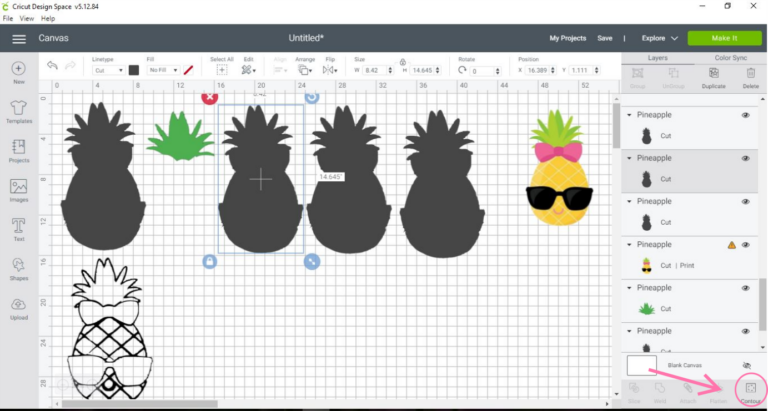
Let's go through one more layer. Select one of the duplicated shapes and press 'contour'.
-
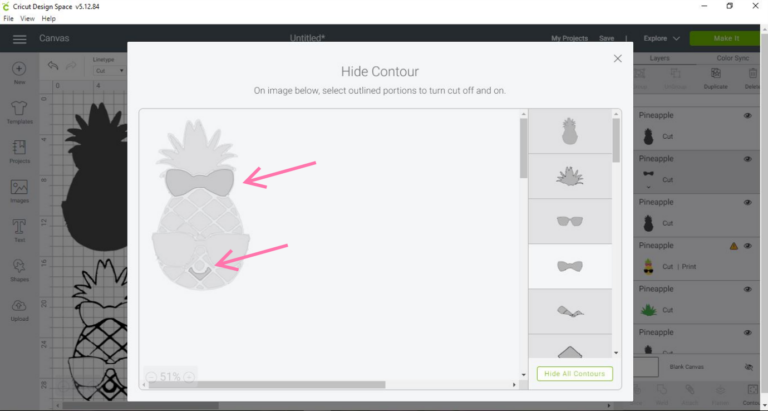
For this layer, I am going to choose all the parts that will be pink. In this case, since the bow and smile are going to be pink, I will remove all the parts that are of different colours. For this example, I don't mind the shadow of the bow, not being there, so I am keeping it the same shade of pink. It depends on your preference.
-
Click out of the box and change the colour of the layer. In my case, it is pink.
-
Do this same procedure for all the other layers.
-
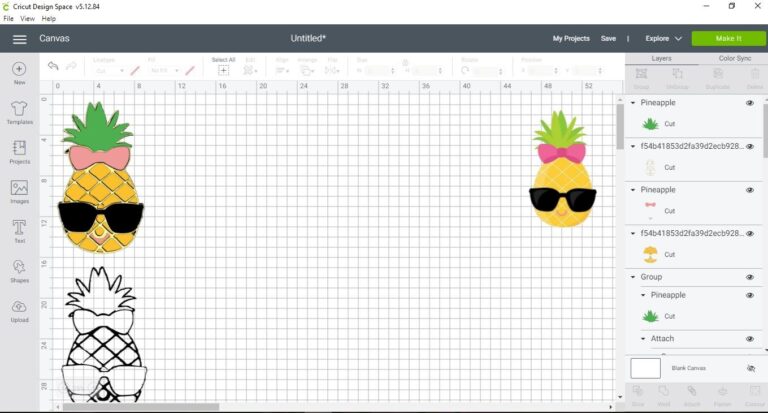
You can now put all the layers on top of one another to create your desired image. This also helps determine if you have missed any layer or piece. It is okay if the layering is slightly off since this is a digital version of your image.
-
Compare with the reference image and once the same, delete the reference image. It is alright if your colours are not exactly the same as the original image since the shade of your material may be different.
-
Select the layers and 'group' them together and adjust the size if need be.
-
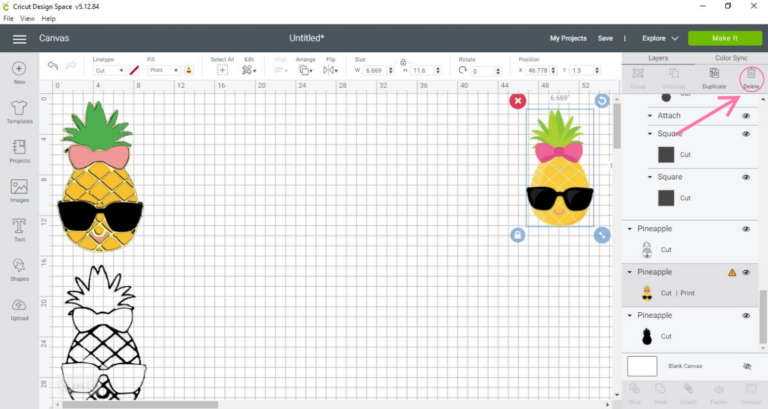
If you will be working with vinyl, a great tip is to add registration marks on either side of your layered image which will assist in layering it once cut out. Press 'shapes' and click the square button.
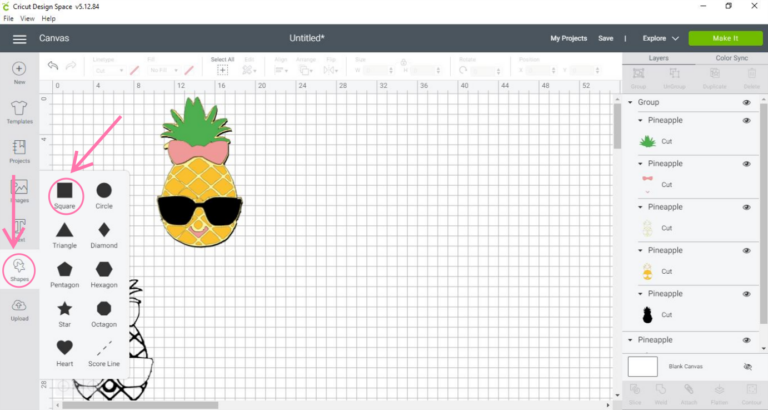
-
Change the size of the square to be smaller than the image by using the dual arrow button.

-
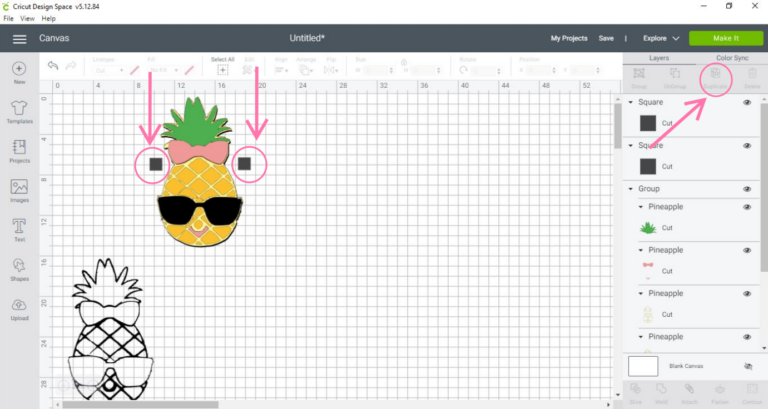
Duplicate it and place these squares on either side of the image
-
Select the squares and 'attach' them together.
-
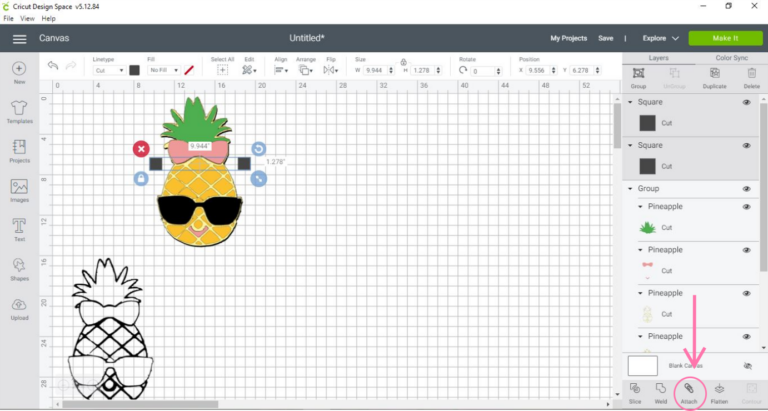
Duplicate the squares for how many layers you have. For instance, 5 layers calls for 5 sets of squares.
-
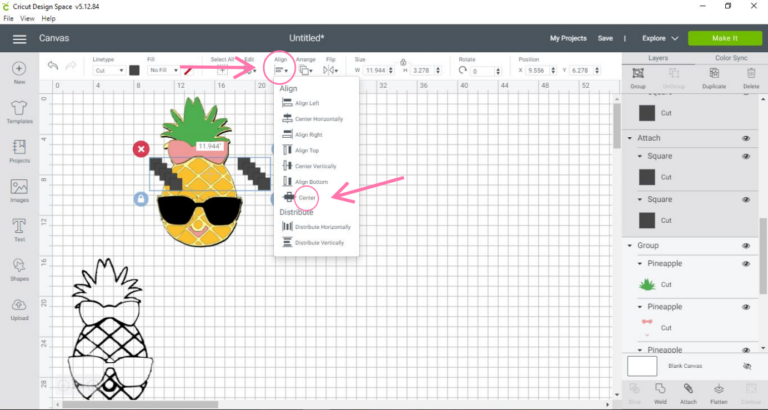
After duplicating your squares, align and center them. If they move, move them back to where you originally placed them.
-
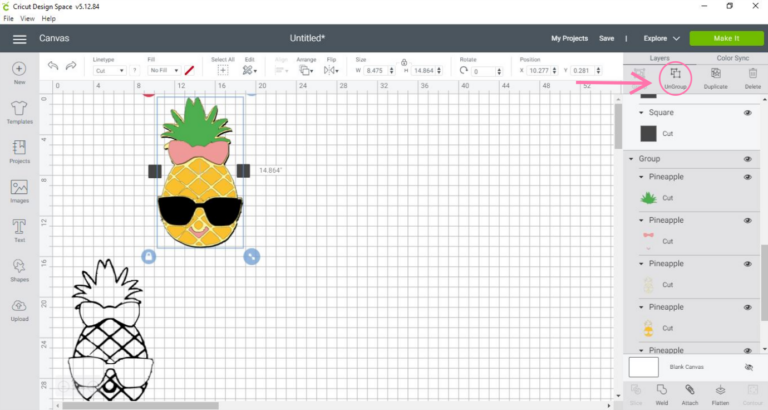
Ungroup your layered image.
-
Then take one set of squares and attach it to one layer. Do the same for all the layers and squares.

-
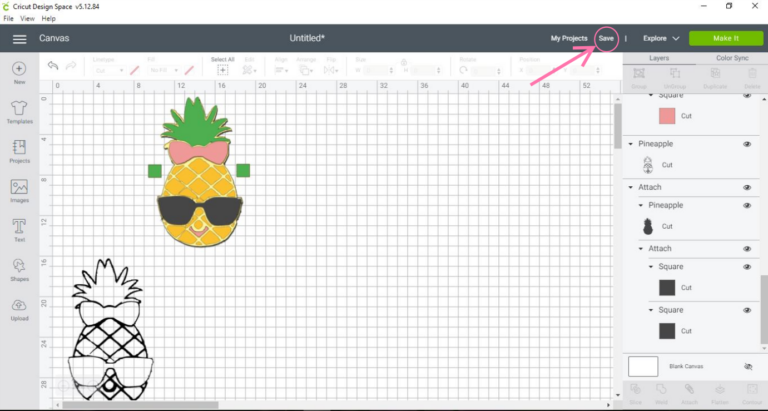
Change the colours back to what they were before and make sure each layer has a set of squares.
-
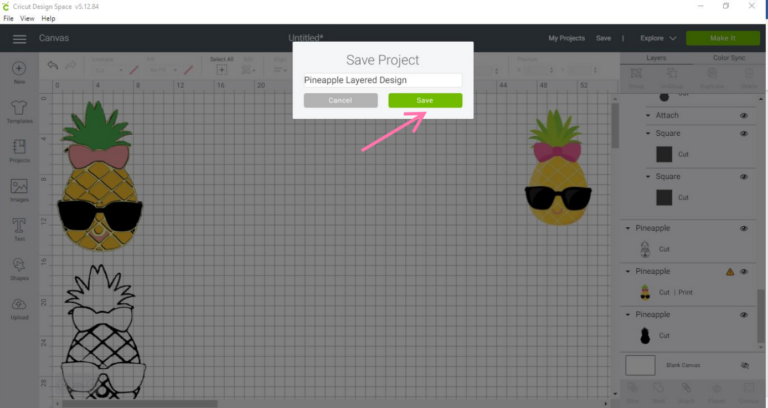
Don't forget to save your project so you can edit or cut it out if you need it later.
-
Add a name and press 'save'.
-
Now we are ready to cut our image. Click on 'make it'.
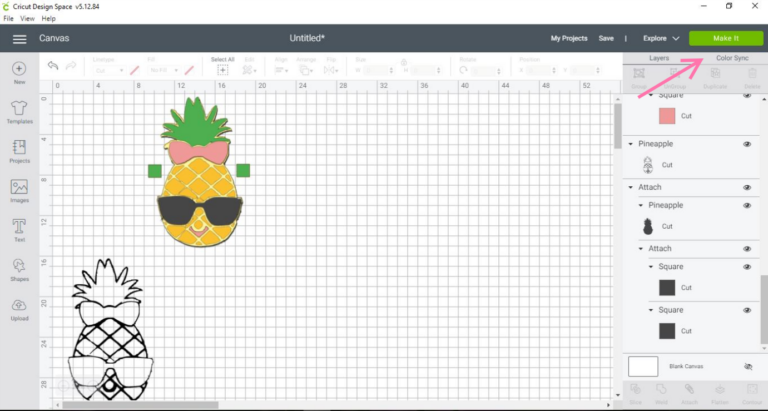
-
There should be a mat for each colour you are using. If you are using heat transfer vinyl (HTV or iron-on), mirror each of your mats. If you are using adhesive vinyl, you can leave it unchanged. Then press 'continue'.
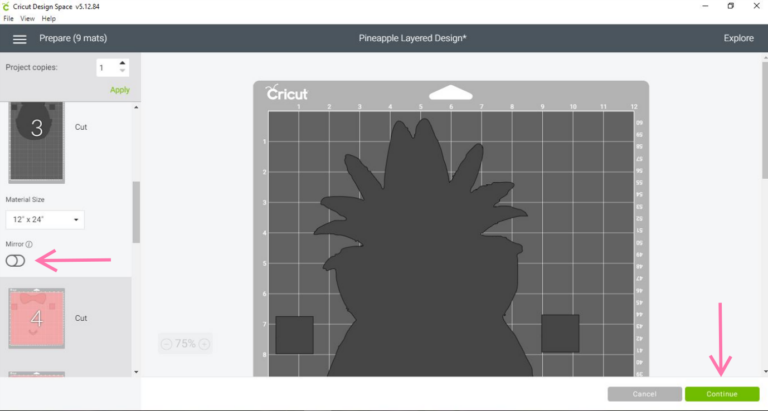
-
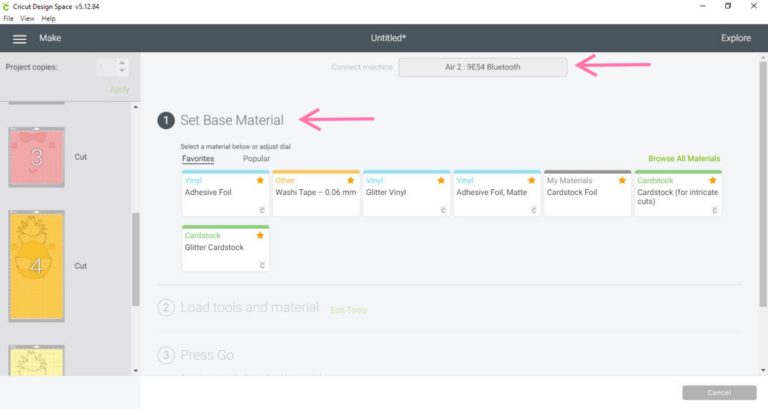
Choose your Cricut device, material setting, and you're all set to cut this multi-layered image!
How to Use Layers on Cricut Maker Design
Source: https://cutnmakecrafts.com/how-to-create-a-layered-image-on-cricut/
0 Response to "How to Use Layers on Cricut Maker Design"
Mag-post ng isang Komento